In the icon microcosm there's a few things that can help you trick the human eye. You have a tiny grid where you will soon run out of pixels ;)
Fortunately there's a few methods to simulate shape with color/value or opacity.
One of the basic aspects of bitmap images is the negative effect of Aliasing.
Although many tools like the brush tool work at a greater resolution than the image, GIMP still has a lot to learn in this area. Especially drawing with 1x1 brush is not behaving like one would expect it to.
The solution is to anti-alias manually. Some people actually prefer to work at a higher resolution and then scale down, but the icon loses sharpness and one has to touch up manually afterwards. And for the touchup one would need a better sub-pixel tools and one gets lost in a circle.
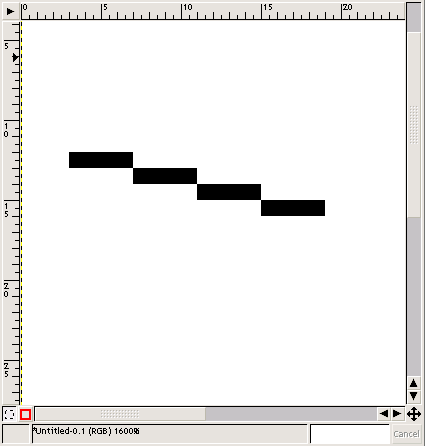
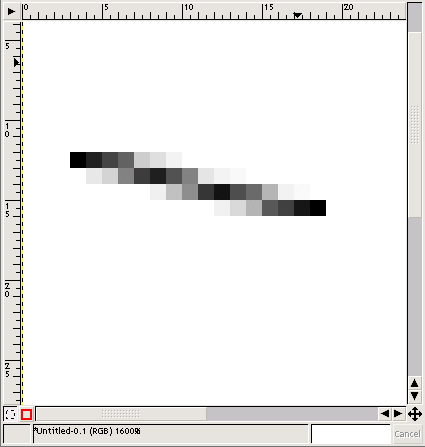
As much as it sounds hard, manual anti-aliasing is easy, and fun! All we need for this is the opacity setting of the pencil tool. Say we have an outline that's aliased (Like shown on Figure 1.3). Select a 1x1 brush and set the opacity to something like 40%. When you start drawing with this black brush by clicking on the white surface, it will become light gray. One more click and it gets darker. That way you can easily create fluent transitions between the two border colors. You can also change the active color using Ctrl+leftMB or just by swaping forground and background colors (X).
If you're using layers to have more freedom experimenting, you will find the erase tool as useful for anti-aliasing as the pencil (Figure 1.4). Make sure you turn on the hard edges otpion.
To give an object a shape you can use gradients. For round objects you choose radial gradient and a linear one for bent surfaces. That said, I use linear gradients almost every time for filling surfaces. Even when the surface is sup[posed to be flat, a slight gradient adds realism. Just keep in mind the brightness difference of the two extreme colors shouldn't be too high.
This section belongs to the cheap tricks category ;) For any object you have, it's always good to play with highlights and shadows. I'm not refering to the regular drop shadow used on all Gnome icons. I'm talking about adding material properties by creating light reflections.
Smooth shading can be done using selections and the airbrush tool. Hard highlights are done using the pencil tool (again, with opacity set to something lower).